Archive | Main Dishes RSS feed for this section

Veggie Pot Pie

25 Nov

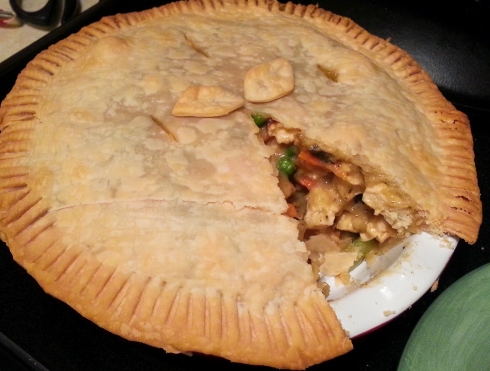
vegan pot pie

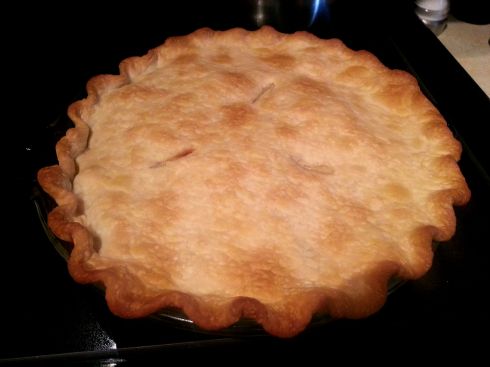
This recipe came from a vegan cookbook I recently acquired. Now I’d made a recipe or two from the book before this one and was pretty underwhelmed with the results. So, I wasn’t expecting much from this. But, I was pleasantly surprised to find that this vegan version of one of my favorite comfort foods was just as delicious as its chicken-based sister.

As far as the prep for this recipe goes, don’t let the seemingly long list of ingredients/steps put you off. It really didn’t take that long to do and the results were well worth it. I would also stress proper preparation of the tofu. Make sure you press out all excess liquid to get the best texture. It’ll give you the most chicken-like results. I have to say that I was very pleased when Sylvie picked out all the tofu and ate it before anything else. Oh and I fully plan on preparing the “breaded” sautéed tofu like this in the future. It was really tasty stuff. I’d say this was my first successful tofu experience. Will definitely make this again.

Mushroom Gravy

  • 2 cups vegetable broth (can substitute 2 cups water and 1 teaspoon vegetable stock powder)
  • 2 Tablespoons vegetable oil
  • 3 Tablespoons nutritional yeast
  • ½ cup fresh mushrooms, diced
  • ½ cup onion, finely chopped
  • ½ teaspoon onion salt
  • flour

Mix all ingredients except flour in a saucepan and heat to a simmer. Slowly add flour a Tablespoon at a time and whisk well after each addition, until gravy thickens up to your liking. Season with black pepper as desired.

Veggie Pot Pie

  • 2 Pie Crusts
  • 1 recipe Mushroom Gravy
  • ¼ cup flour
  • 1 teaspoon salt
  • 1/8 teaspoon black pepper
  • 1 Tablespoon nutritional yeast
  • ¾ teaspoon garlic powder
  • 2 cups firm tofu, squeezed dry and cubed
  • 2 Tablespoons oil
  • 1 onion, chopped
  • 1 carrot, chopped
  • 1 stalk celery, sliced
  • 1 cup frozen mixed vegetables

Preheat oven to 375 degrees. Line a pie plate with one of the pie crusts and bake for 10-15 minutes, until just starting to brown slightly.

Combine flour, salt, pepper, nutritional yeast, and garlic powder. Place in a paper bag or medium-sized container with tofu and shake or toss well to coat tofu.

Heat oil in a skillet over medium-high heat and sauté tofu until lightly browned, then add the onion, celery, and carrot. Continue to sauté until the onions are soft, then add the mixed vegetables and cook until they’re slightly tender but still crisp. This should only take another 5-10 minutes.

Add the gravy to mixture in the skillet and stir well, then transfer as much as will fit in the pie plate containing the baked pie crust. Cover with the second unbaked pie crust. Seal the edges by pressing together with a fork. Cut a few slits in the top of the crust.

Bake for 30 minutes in the preheated oven, or until top crust is lightly browned.

Recipe adapted from “Hot Damn and Hell Yeah: Recipes for Hungry Banditos” 

Roasted Buddha Bowl

29 Oct

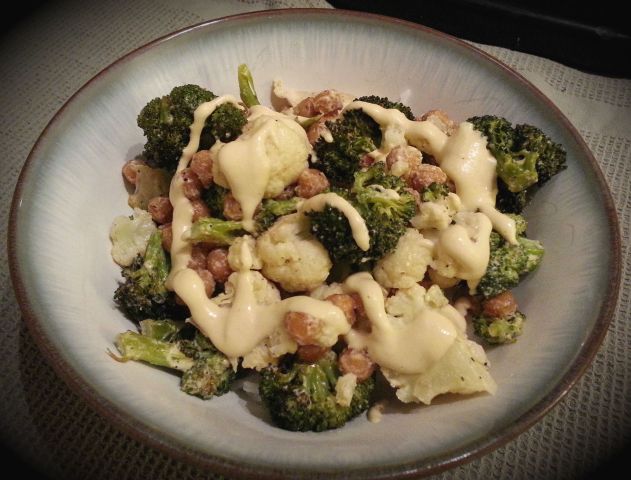
buddha bowl

I wasn’t expecting a lot from a bowl filled with veggies and beans, but this really hit the spot. Both the cauliflower and broccoli were vastly improved by the roasting process as were the chickpeas. Seriously, if you’ve never had roasted, crunchy chickpeas, you’re missing out. But, my favorite part of the dish was the sauce. Holy moly. That was some good stuff. I think it was the nutritional yeast that gave it the unique flavor I loved so much, which was a relief because I was a bit scared of the stuff. I can’t wait to try using it to make “cheese” sauces and such. Anyway, the sauce was so good I made another double batch later on just to have on hand for other assorted veggie bowls. Oh and don’t be like me and forget about making some sort of grain to go with the Buddha bowls. Sadly I didn’t have time to make brown rice so I went with white. Which was delicious, but the nuttiness of brown rice would be so amazing with this.

Go to Recipe

Tex Mex Spaghetti Squash with Black Bean Guacamole

28 Oct

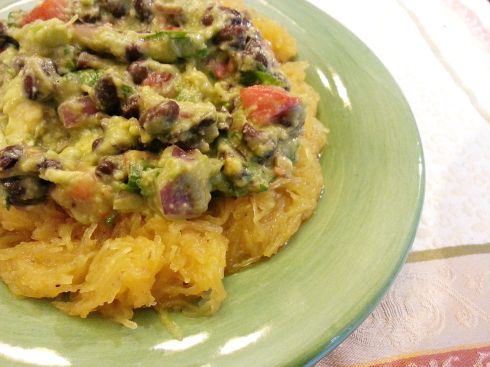
southwest squash

I’ve had several spaghetti squashes sitting on my kitchen counter for the last couple of weeks and finally decided to get them out of the way. Not wanting to do the typical “spaghetti” thing with them, I looked around for something a bit more unique. I thought this recipe looked great and was happy to find that it was easy to make and full of flavor. The black bean guacamole was especially delicious and even Sylvie gobbled up the squash!

Go to Recipe

Quick Spinach Alfredo Lasagna

25 Oct

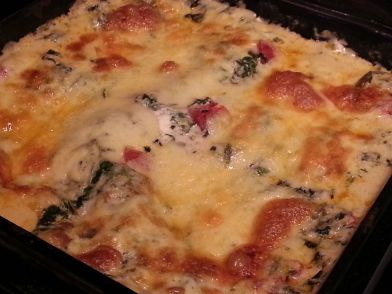
This was another incredibly delicious, fast meal from my America’s Test Kitchen Quick Family Cookbook. I ended up subbing gouda cheese for fontina because they didn’t have it at the grocery store. I also omitted the porcini mushrooms because I couldn’t find those either. Be sure to let it cool a bit otherwise it’ll be a tad runny. This was especially delicious as leftovers the next day!

spinach lasagna

Ingredients

  • 1 (15-ounce) jar Alfredo sauce
  • 1 cup water
  • 10 ounces frozen spinach, thawed, squeezed dry, and chopped fine
  • 1 tomato, cored and cut into ½-inch pieces
  • 4 ounces fontina cheese, shredded (1 cup)
  • 1/8 ounce dried porcini mushrooms, rinsed and minced
  • 4 ounces (½ cup) ricotta cheese (do not use low-fat or nonfat ricotta here)
  • 6 no-boil lasagna noodles

Directions

1. Adjust oven rack to middle position and heat oven to 425 degrees. Grease 8-inch square baking dish with vegetable oil spray.

2. Combine Alfredo sauce, water, spinach, tomato, ½ cup fontina, and mushrooms in bowl until uniform. Gently fold in ricotta, leaving some clumps. Spread ½ cup sauce into prepared baking dish. Lay 2 noodles into dish, and top with 1 1/3 cups sauce. Repeat layering of noodles and sauces two more times.

3. Cover lasagna and microwave until just warmed in center, about 5 minutes. Uncover, top with remaining ½ cup fontina, and bake until cheese is just beginning to brown, 15 to 20 minutes. Let cool slightly and serve.

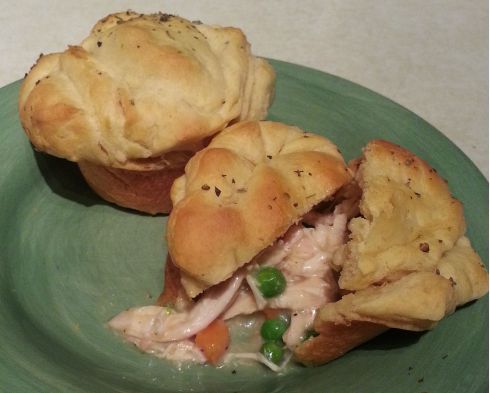
Chicken Pot Pie Muffins

13 Oct

pot pie muffins

What is it with me and pocket-like foods lately? I don’t know, but they sure are delicious! I tweaked this recipe just a tad so I’m going to post what I did as I think it was easier to assemble than the original recipe. Just a warning as this recipe made a lot. I made 24 muffins and had enough left over that I might have been able to do 8 more.

Ingredients
  • ¼ tsp garlic powder
  • ¼ tsp black pepper
  • 1 rottiserie chicken, shredded (or 3 cooked chicken breasts)
  • 1 bag (16 oz) frozen vegetables
  • 2 cans (10 oz) cream of chicken soup
  • milk (about 1/2 cup)
  • 4 cans (8 ct) flaky butter tastin biscuits
  • Italian seasoning
  • nonstick cooking spray
 Instructions

Heat oven to 375 degrees. In a large saucepan, heat cream of chicken soup (just the concentrate, do not add milk or water). While the soup is heating, rinse veggies in a strainer to thaw. Add to soup along with cooked, shredded chicken, garlic powder, and black pepper and combine well. Thin to desired consistency with milk (I used about 1/2 cup).  Stir gently to combine and allow to heat until warmed through. Remove from heat.

Lightly spray muffin cups with nonstick cooking spray. Working with one biscuit at a time, separate biscuit into two layers. Flatten one half until it is the size of your palm and place on top of one muffin tin opening (do not press down into cup).  Place approximately 3 tablespoons of the chicken mixture on top of the flattened dough (I used a heaping cookie scoop). Quickly flatten the other half of the biscuit and place on top of the filling, pressing the dough together around the edge. Shove the edges down into the muffin cup (don’t try and make it pretty) so nothing is overhanging onto the pan. Repeat with remaining biscuit dough and filling.

When finished, spray the tops of all the muffins with non-stick spray and sprinkle with italian seasoning.

Bake for 15 to 17 minutes or until golden brown.

Adapted from Simply Being Mommy

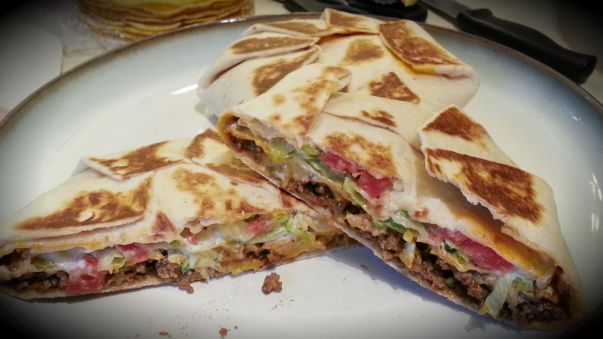
Homemade CrunchWrap Supremes

12 Oct
I couldn’t wait to post this recipe because it turned out SO good. For reals. I may just live off of these for the unforeseeable future. They were incredibly easy to make and fun to eat. Not to mention delicious! I chose to put my nacho cheese in a pastry bag to make assembly easier and it worked really well. Also, I highly recommend using nacho cheese if at all possible. At my grocery store they keep it in the pasta aisle in the same general area as the Velveeta cheese. I bet these would be awesome for kids to eat as well because they were so much easier to eat than tacos. And they look cool. So make them!
crunchwrap
  • 5 large flour tortillas
  • 5 small tostada shells
  • 1 pound ground beef
  • 1 package taco seasoning
  • sour cream
  • nacho cheese (or shredded Mexican blend cheese)
  • shredded lettuce
  • diced tomatoes
Brown ground beef in a skillet, then add taco seasoning (according to package directions). Set aside.
Working with one flour tortilla at a time, microwave for about 10 seconds. Lay out the flour tortilla and spoon some of the seasoned beef into the center. Top with some nacho cheese (or shredded cheese). Place the tostada shell on top of the cheese and spread a dollop of sour cream on top of it. Top with diced tomatoes and shredded lettuce.
Starting with the bottom of the tortilla, fold the edge up to the center. Continue doing this in a clockwise or counter-clockwise movement until all of the tortilla is folded over, and the filling is entirely enclosed. If your filling isn’t entirely enclosed, cut out a circle from another flour tortilla and place it on the exposed area, then wrap the tortilla again.
Spray a frying pan with cooking spray.  Carefully place the Crunchwrap, seam-side down, in the pan. Press with a spatula and cook on medium-low heat, for about 3 minutes, until the bottom is nice and brown. Flip it over and cook for another 3 minutes. Serve and enjoy.

Related Posts Plugin for WordPress, Blogger...

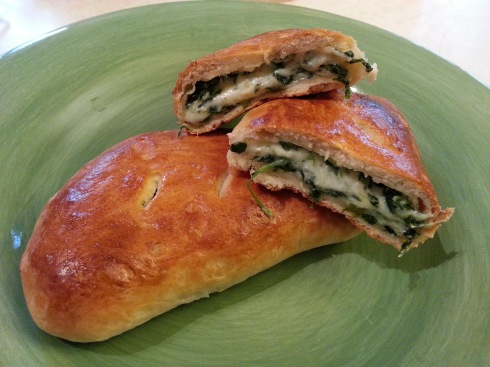
Easy Cheesy Hot Pockets with Spinach

1 Oct

I made these hot pockets tonight and they were so delicious and turned out so pretty I had to post the recipe right away. This recipe came from my America’s Test Kitchen Quick Family Cookbook in the “Kid Friendly” section. I am happy to report that not only did I love them, but Sylvie did too! I will definitely be making these again soon!

hot pockets

Serves 4

Total Time: 35 minutes

“Avoid using buttermilk or other flavored biscuits here.”

  • 3 tablespoons olive oil
  • 4 ounces (1/2 cup) whole-milk ricotta cheese
  • 4 ounces mozzarella cheese, shredded (1 cup)
  • 1 ounce Parmesan cheese, grated (1/2 cup)
  • 1 garlic clove, minced
  • 4 ounces frozen chopped spinach, thawed, squeezed dry
  • 1 teaspoon minced fresh oregano
  • Salt and pepper
  • 1 (16-ounce) tube refrigerator biscuits (8 biscuits)
  • 1 large egg, lightly beaten

Adjust oven rack to middle position and heat oven to 450 degrees. Brush rimmed baking sheet with 1 tablespoon oil. Combine remaining 2 tablespoons oil, ricotta, mozzarella, Parmesan, garlic, spinach, oregano, 1/4 teaspoon salt, and 1/8 teaspoon pepper in bowl.

Press each biscuit flat into 6-inch round. Spread filling evenly over bottom half of each dough round, leaving 1/2-inch border at edge. Brush dough edges lightly with egg, then fold top of dough over filling, leaving 1/4-inch lip of bottom edge exposed. Fold bottom lip over seam and press firmly to seal. Lay pockets, seam side down, on prepared baking sheet. Brush with egg and, using sharp knife, cut 2 (1-inch) steam vents along top.

Bake until golden, 10 to 12 minutes, rotating baking sheet halfway through baking. Transfer pockets to wire rack and let cool slightly before serving.

Variations

Easy Cheesy Hot Pockets with Broccoli

Add 4 ounces frozen broccoli florets, thawed, patted dry, and chopped to filling in place of spinach.

Easy Cheesy Hot Pockets

Increase amount of ricotta to 1 cup and eliminate spinach.

From: The America’s Test Kitchen Quick Family Cookbook

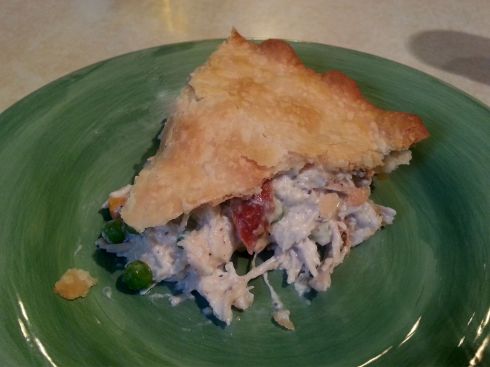
Easiest-Ever Chicken Pot Pie

25 Sep

chicky pot pie

While I have posted the fast version my chicken pot pie before, I have to say this America’s Test Kitchen one is even better. It’s very unfussy and the resulting pie is darn near perfect. I’d say this took about 45 minutes to make from start to finish and that included the time to shred my rotisserie chicken. Not bad. Not bad at all!

Chicken Pot Pie

Serves 4-6

Total Time: 45 minutes

  • 8 ounces white mushrooms, trimmed and quartered
  • 3 cups shredded rotisserie chicken
  • 5 ounces cream cheese, cut into small cubes*
  • 1 cup low-sodium chicken broth
  • 1/2 cup heavy cream
  • 1 tablespoon cornstarch
  • Salt and pepper
  • 1 ½ cups frozen peas and carrots, thawed
  • 1 refrigerated Pillsbury pie crust

Adjust oven rack to the middle position and heat oven to 425 degrees. Microwave mushrooms on plate lined with 2 layers of coffee filters until softened, about 7 minutes.

Meanwhile, combine shredded chicken, cream cheese (or Boursin), broth, cream, cornstarch, 1/2 teaspoon salt, and 1/2 teaspoon pepper in large saucepan and cook over medium-high heat, stirring often, until cheese is melted and mixture is thickened, 5 to 7 minutes. Stir in microwaved mushrooms and peas and carrots. Season with salt and pepper to taste. Transfer to a 9-inch deep dish pie plate.

Carefully lay pie crust over top. Tuck overhanging dough underneath itself to be flush with rim of pie plate. Cut three 1-inch steam vents into top of dough. Bake until filling is bubbling and crust is browned, about 25 minutes, rotating pie plate halfway through baking. Let cool slightly and serve.

*Original recipe calls for a 5.2 ounce package of Boursin cheese, crumbled. I’d never heard of Boursin and wasn’t surprised when my local grocery store didn’t carry it. The Internets told me cream cheese was an acceptable substitute and I whole-heartedly agree.

Recipe adapted from the America’s Test Kitchen Quick Family Cookbook

Skillet Baked Ziti

15 Sep

skillet penne

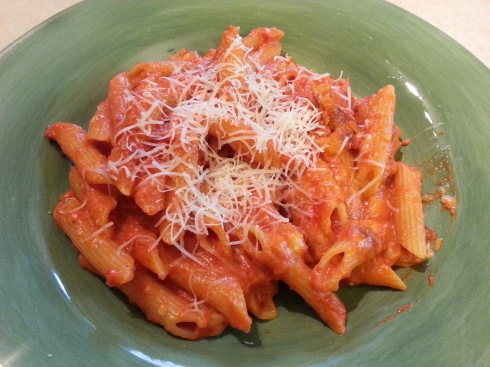
For the last year or so I’ve had to stay away from tomatoes and tomato-based dishes because of Sylvie’s intolerance to them. Let me tell you how much more difficult this made meal planning. But, the heavens have opened and it seems the issues have faded and I can now enjoy all things tomato. I’ve been wanting to try this recipe for a while now because it was recommended so highly from my sister, Annie. Plus it’s an America’s Test Kitchen recipe so you can’t go wrong there.

I was very pleased with the results of the this recipe. I was very skeptical as I was making it that it would be horribly bland, but that was not the case. It was super easy to throw together and was on the table in 30 minutes. Did I mention Sylvie scarfed it up? Yeah. This is a keeper.

SKILLET BAKED ZITI

Serves 4

“To complete this recipe in 30 minutes, preheat your oven before assembling the ingredients. If your skillet is not ovensafe, transfer the pasta mixture to a shallow 2-quart casserole dish before sprinkling with the cheese and baking. Packaged preshredded mozzarella is a real time-saver here. Penne can be used in place of the ziti.”

  • 1 tablespoon olive oil
  • 6 medium garlic cloves, minced (about 2 tablespoons)
  • 1/4 teaspoon red pepper flakes
  • Table salt
  • 1 (28-ounce) can crushed tomatoes
  • 3 cups water
  • 12 ounces ziti (3 3/4 cups; see note)
  • 1/2 cup heavy cream
  • 1 ounce Parmesan cheese, grated (about 1/2 cup)
  • 1/4 cup minced fresh basil leaves
  • Ground black pepper
  • 4 ounces whole milk mozzarella cheese, shredded (about 1 cup; see note)
  1. Adjust an oven rack to the middle position and heat the oven to 475 degrees.
  2. Heat the oil in a 12-inch nonstick ovensafe skillet over medium-high heat until hot. Add the garlic, red pepper flakes, and 1/2 teaspoon salt and sauté until fragrant, about 1 minute. Add the crushed tomatoes, water, ziti, and 1/2 teaspoon salt. Cover and cook, stirring often and adjusting the heat as needed to maintain a vigorous simmer, until the ziti is almost tender, about 15-18 minutes.
  3. Stir in the cream, Parmesan, and basil. Season with salt and pepper to taste. Sprinkle the mozzarella evenly over the ziti. Transfer the skillet to the oven and bake until the cheese has melted and browned, about 10 minutes. Using potholders (the skillet handle will be hot), remove the skillet from the oven. Serve.

From: America’s Test Kitchen TV Show Cookbook 

Salmon Panzanella

15 Aug

salmon panzanella

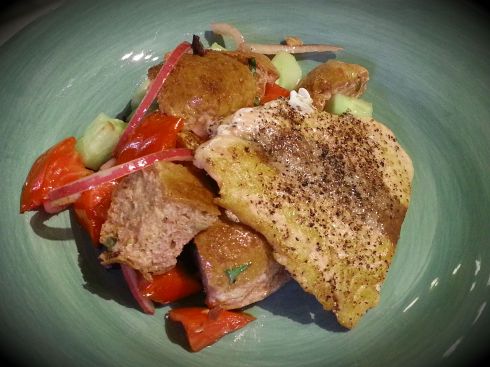
This recipe is actually a repeat from a while back, but I thought it deserved the limelight again, especially for this time of year. I’m not sure why I originally chose to make this recipe as I’m not a huge fan of cucumbers and the potential for soggy bread cubes wasn’t all that appealing. But, despite all my initial reservations, this has become one of my favorite summer recipes.  It’s a great way to use up those fresh cucumbers and tomatoes from the garden and it’s fast! While the original recipe says to use a couple slices of wheat bread, I’ve had the best success with wheat rolls. The crust on the outside prevents the bread from becoming soggy and helps to hold its shape better. If you’re not a salmon fan, the salad alone is worth trying.

Go to Recipe